
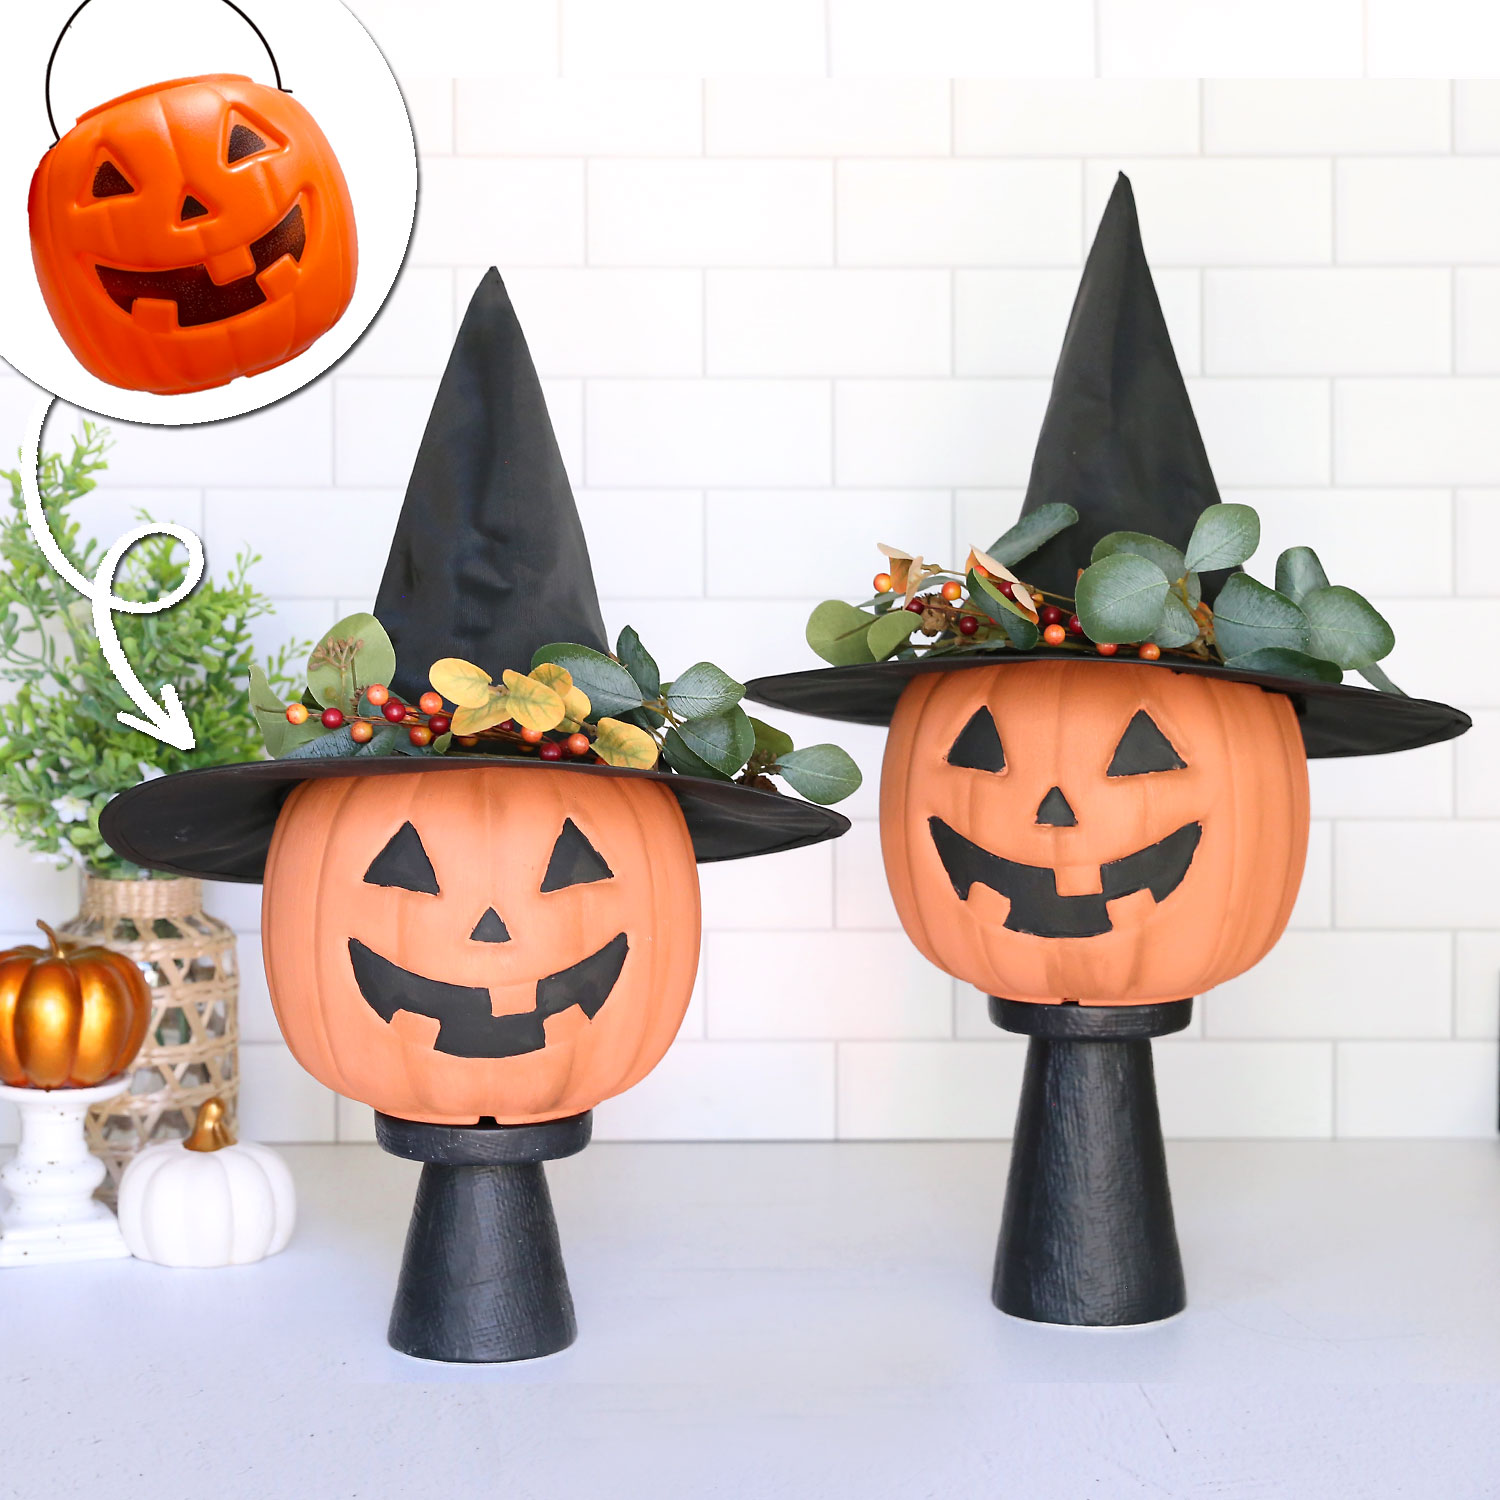
In today’s post: Grab a cheap plastic pumpkin and make it look like a terra cotta jack-o-lantern, perfect for decorating your mantel or front porch. This is an easy Halloween craft for adults.

Terra Cotta Jack-o-Lanterns
I kind of hate carving pumpkins. And by “kind of” I mean I really hate carving pumpkins. I’m just not that interested in scooping out squelchy pumpkin guts and then watching the pumpkin slowly rot. So this year I’m skipping the real pumpkins and decorating with these cute “terra cotta” jack-o-lanterns:
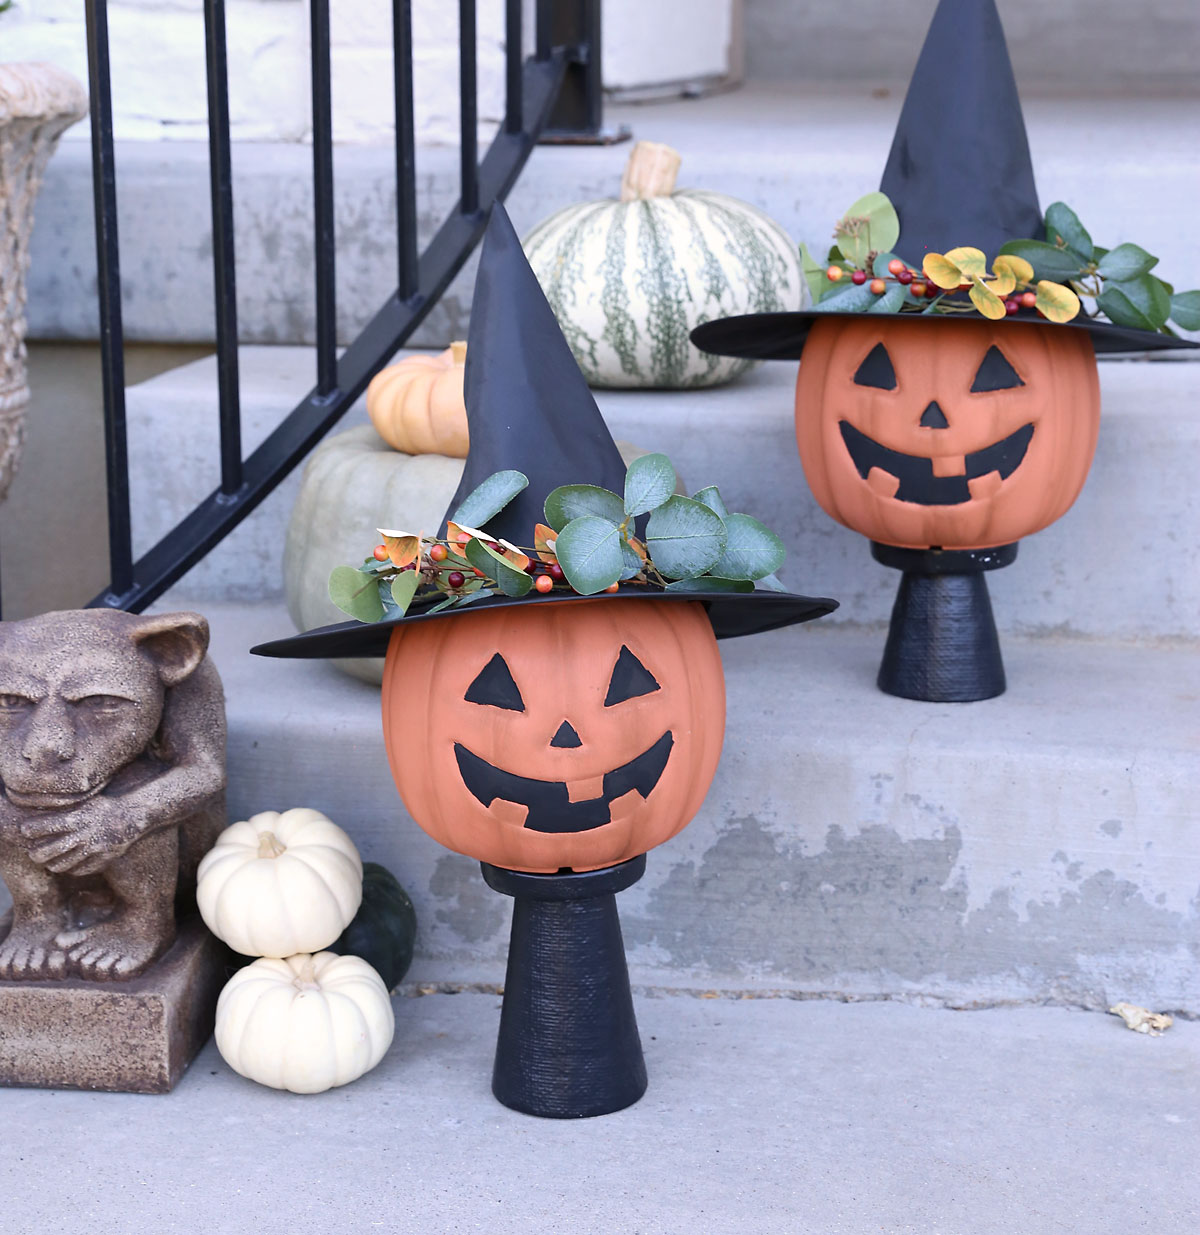
Terra cotta pumpkins are all the rage this year, but they are expensive! Like upwards of a hundred dollars each. That’s a big nope for me, so I grabbed a couple of those bright orange plastic pumpkin buckets and gave them an easy transformation:
Supplies
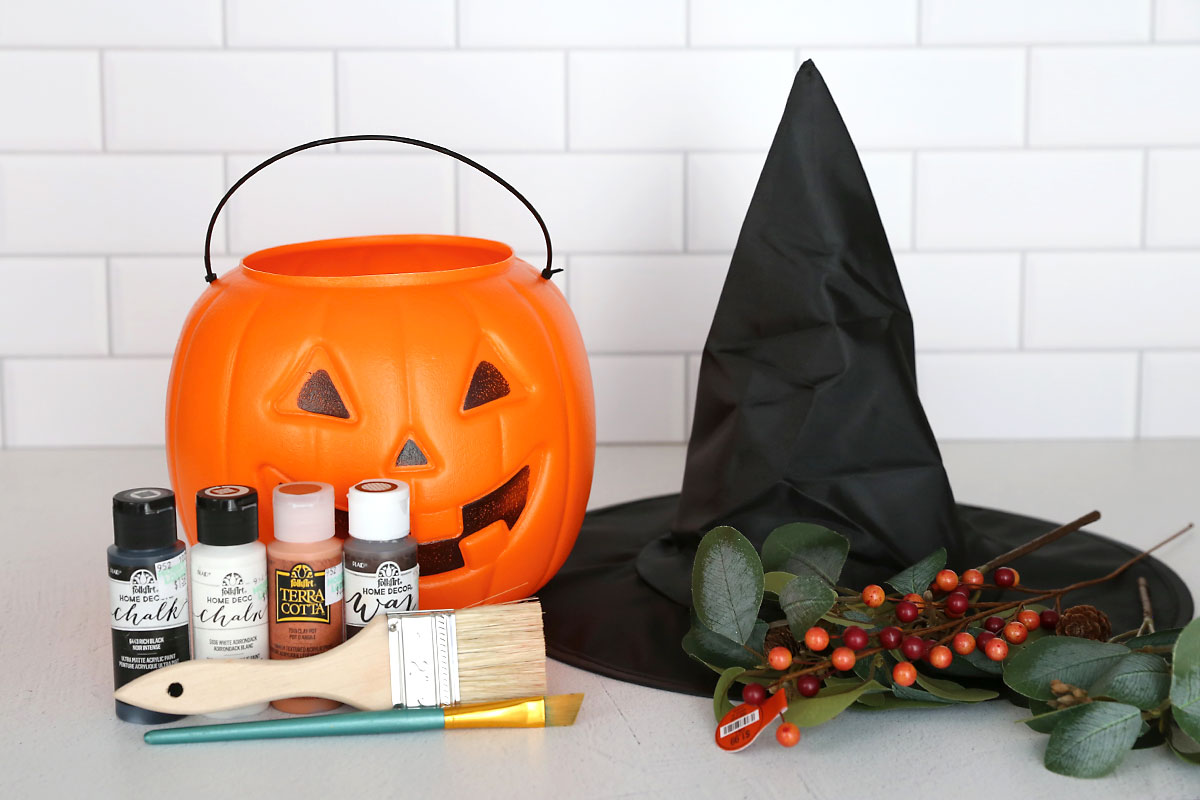
Here’s what you’ll need to make these cute terra cotta Jack-o-lanterns:
- Plastic Pumpkin Bucket: These are the pumpkin shaped trick or treating buckets you can find at most dollar stores and Walmarts this time of year.
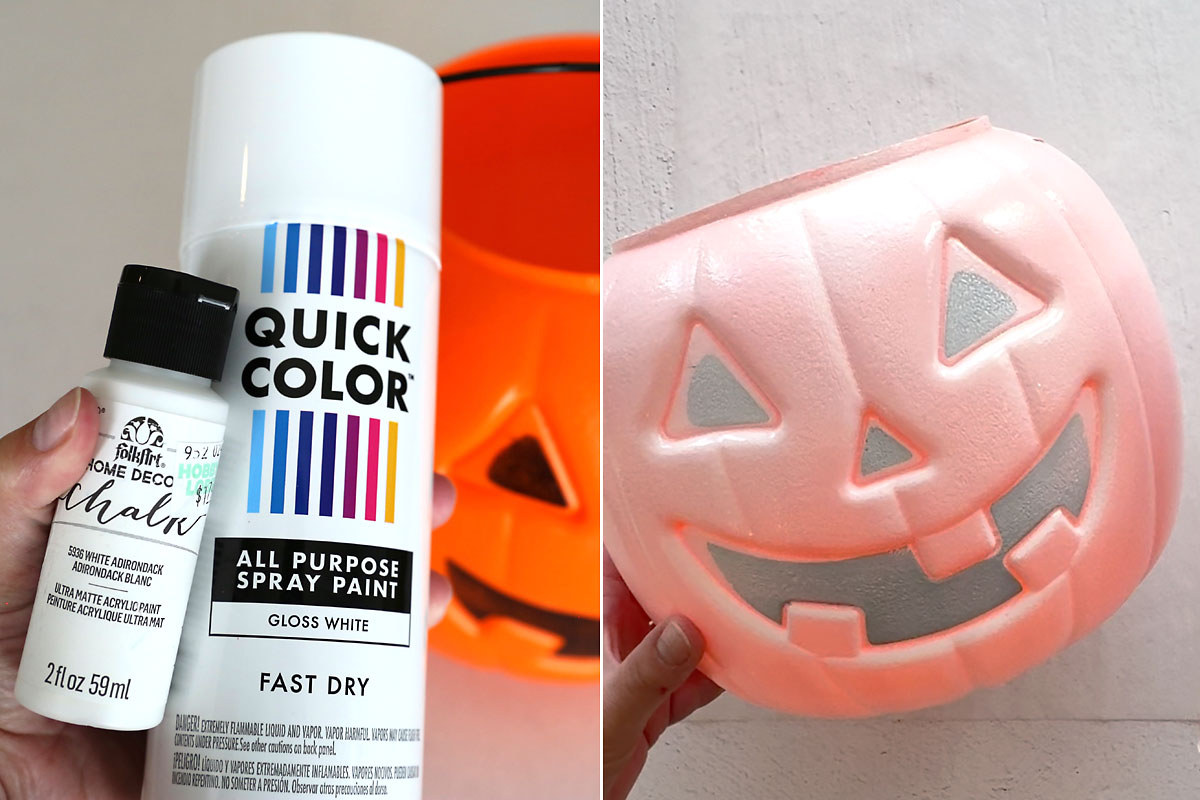
- White Paint: You’ll use this as a base coat on the pumpkin. You can use cheap acrylic craft paint or cheap spray paint here.
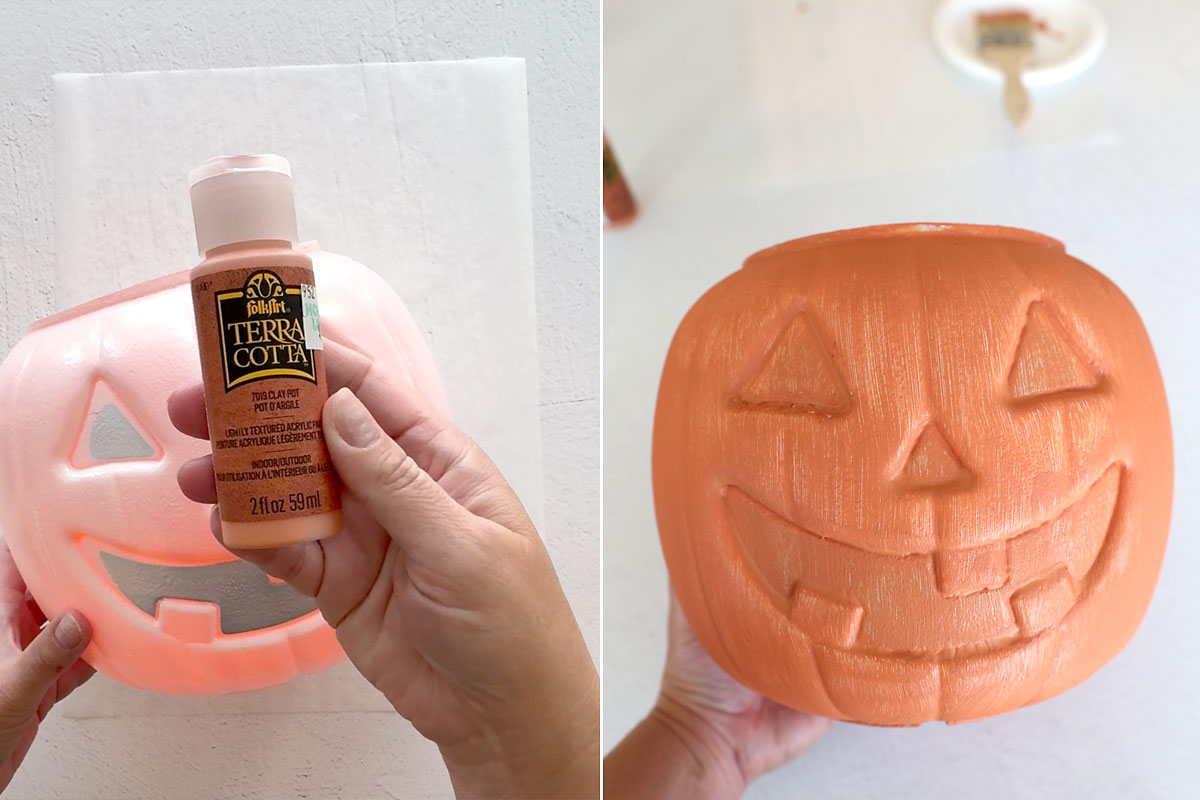
- Terra Cotta Paint: I found this at Hobby Lobby and used the “clay pot” color. This paint is great because it has texture in it, so as you paint it on you really get the textured look of a terra cotta pot. If you can’t find this specific paint, you can also mix baking soda into normal craft paint to add some texture.
- Black Paint: for painting the eyes, nose, and mouth
- Home Decor Wax: this is an optional supply that I used to make my jack-o-lantern look a little aged and distressed, but you can skip this if you prefer a cleaner look.
- Chip paintbrush and a small detail paintbrush
- Witch Hat: I used this hat from Walmart (it comes with hair that I cut off)
- Faux greenery and berries to decorate the hat with
- Candle Holders: this is another optional supply. I set the finished jack-o-lanterns on top of these candle holders from Amazon to give them some added height.
Plastic Pumpkin Makeover Instructions
This is an easy Halloween craft that doesn’t take tons of hands on time. However, you will need to paint multiple coats onto the pumpkin bucket and let it dry in between each coat, so you may want to plan to work on it in a couple different sessions. You can use a hair dryer or heat gun to speed up the drying process. Remember to protect your work surface when painting.
Paint a Base Coat
I found it was easiest to paint the pumpkin white first, using either spray paint or acrylic craft paint. Having a base coat makes it easier for the terra cotta paint to stick, and also means you will use less of the terra cotta paint, which is a little more expensive than standard craft paint. Use one or two coats of white paint. The pumpkin does not need to be completely white. (Note: I did cut off the handle before painting.)
Paint the Pumpkin
Once the white paint is dry, you can start painting with the terra cotta paint. I found this terra cotta paint at Hobby Lobby that already has a texture mixed into it. If you can’t find this type of paint, you can stir some baking soda into regular craft paint to give it texture. The first coat will look a little streaky.
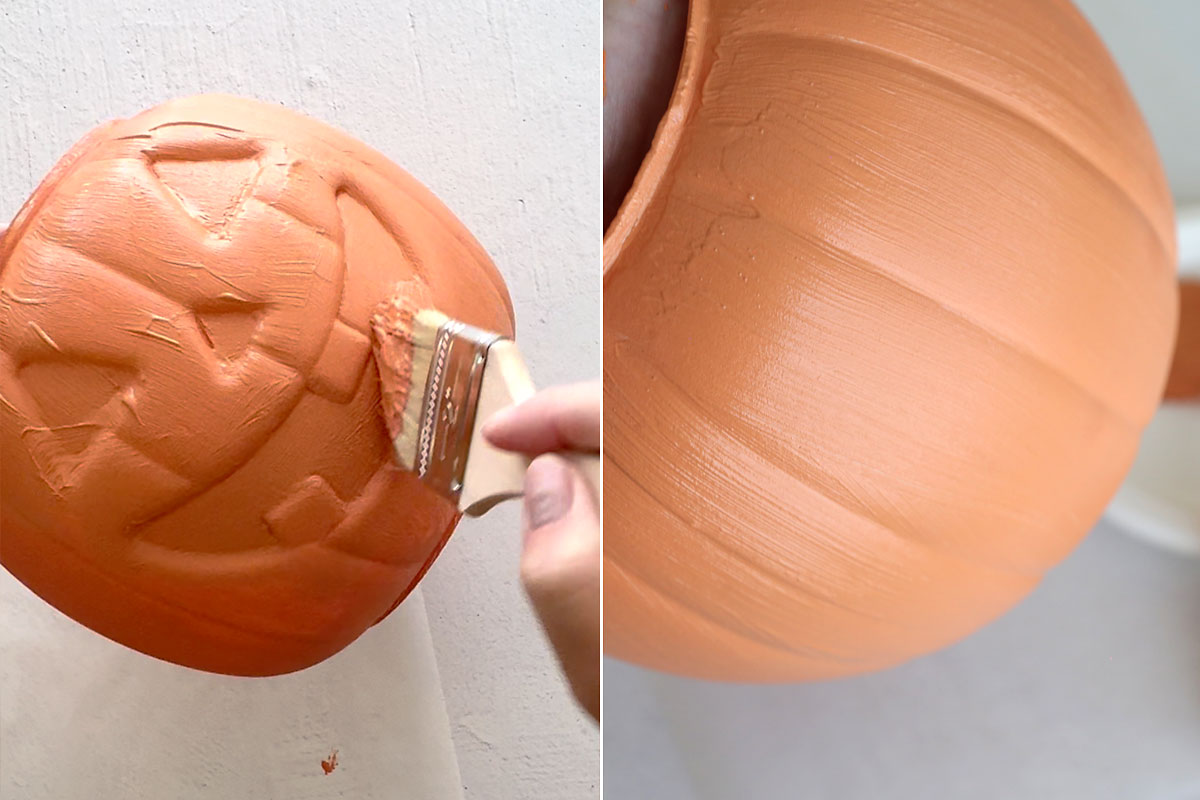
Let the first coat dry, then add a second coat. This coat will go on much easier and will cover much better. Be sure to work the paint into all the corners, then finish with an up and down stroke. This will give you a lovely texture that makes the pumpkin look like a clay pot.
Paint the Details Black
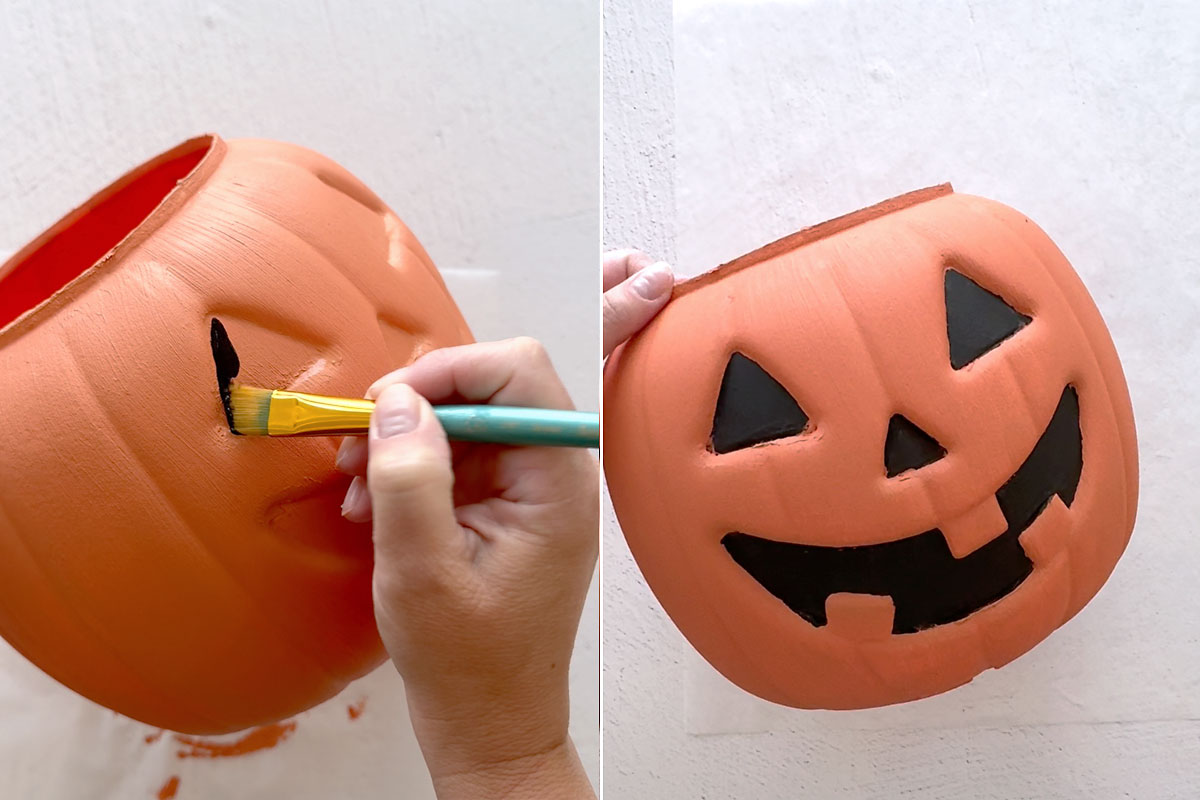
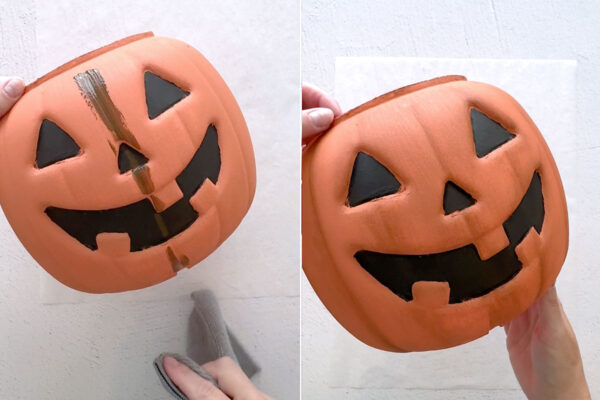
After the terra cotta paint is dry, you can use a small paintbrush to paint the face black, if desired. I used a small angled brush out of a cheap pack of paintbrushes from Walmart. Just follow the depressions with the brush to outline the face, then fill in each section. This only took one coat. If you mess up and get a little black paint outside of the face, don’t worry. Just let it dry and then touch it up with terra cotta paint.
Add Wax if Desired
If you’d like to give your jack-o-lantern an aged, distressed look, you can easily do that using home decor wax (found in small bottles at Hobby Lobby). Dip a corner of a microfiber cloth into the wax and swipe it down the pumpkin along one of the depressions. Then wipe up and down with the cloth to wipe some of the wax back off, letting it settle into the depression. I went all the way around the pumpkin, adding wax in each vertical line. I added wax around the eyes, nose, and mouth as well.

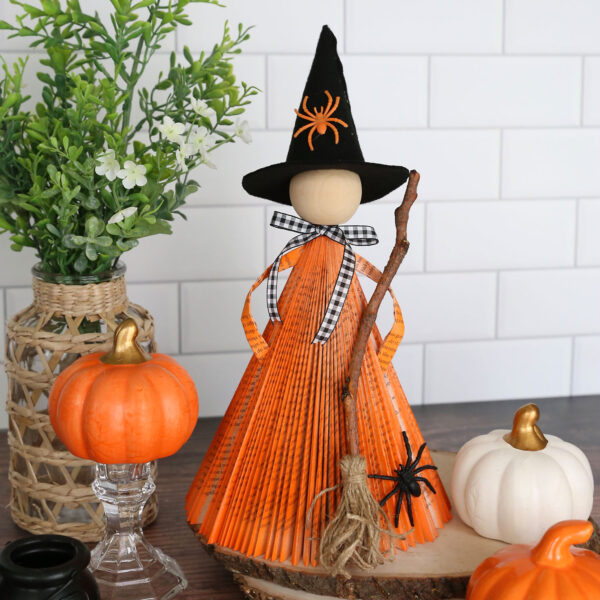
Add the Hat
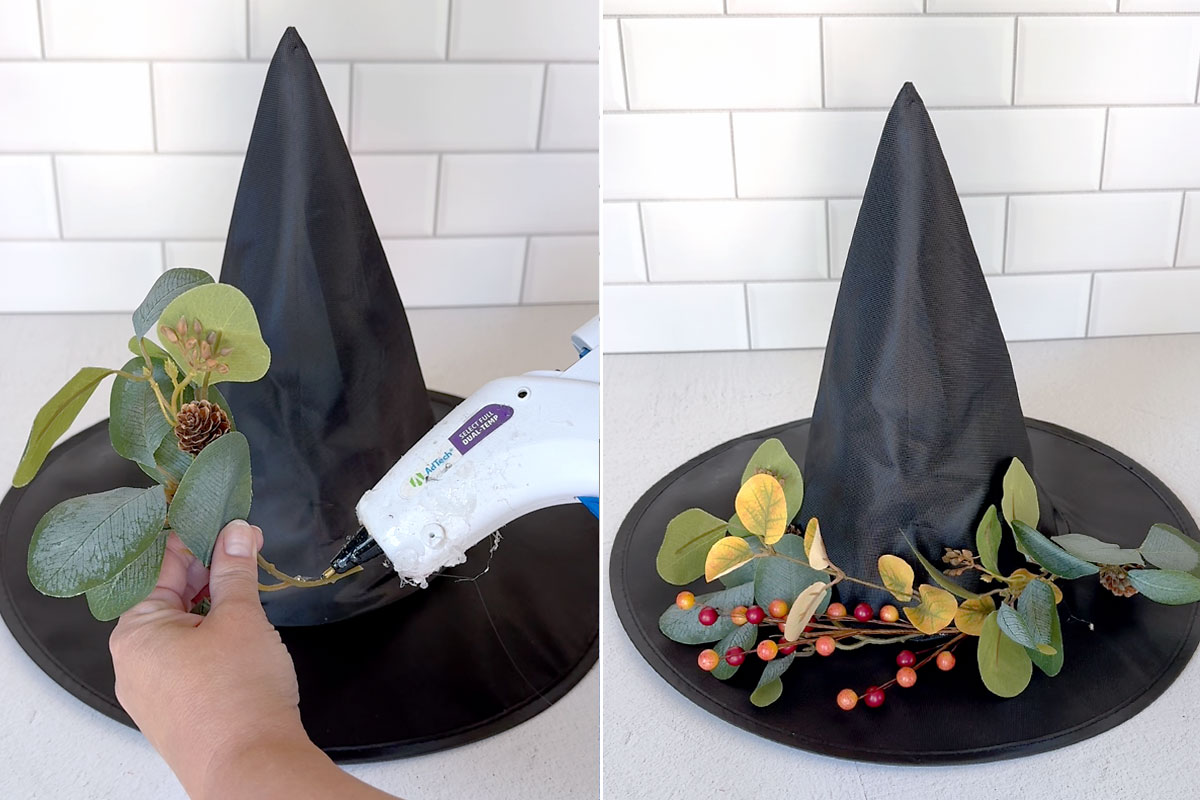
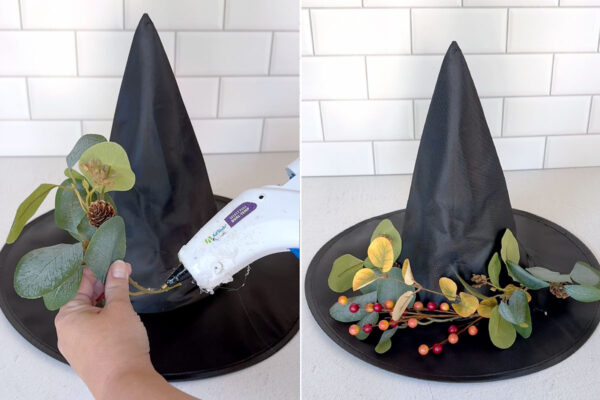
At this point the plastic pumpkin makeover is almost done – all that’s left is to add a witch hat to make them even cuter. I snipped a couple stems of faux leaves and berries into small pieces, then hot glued them to the hat.
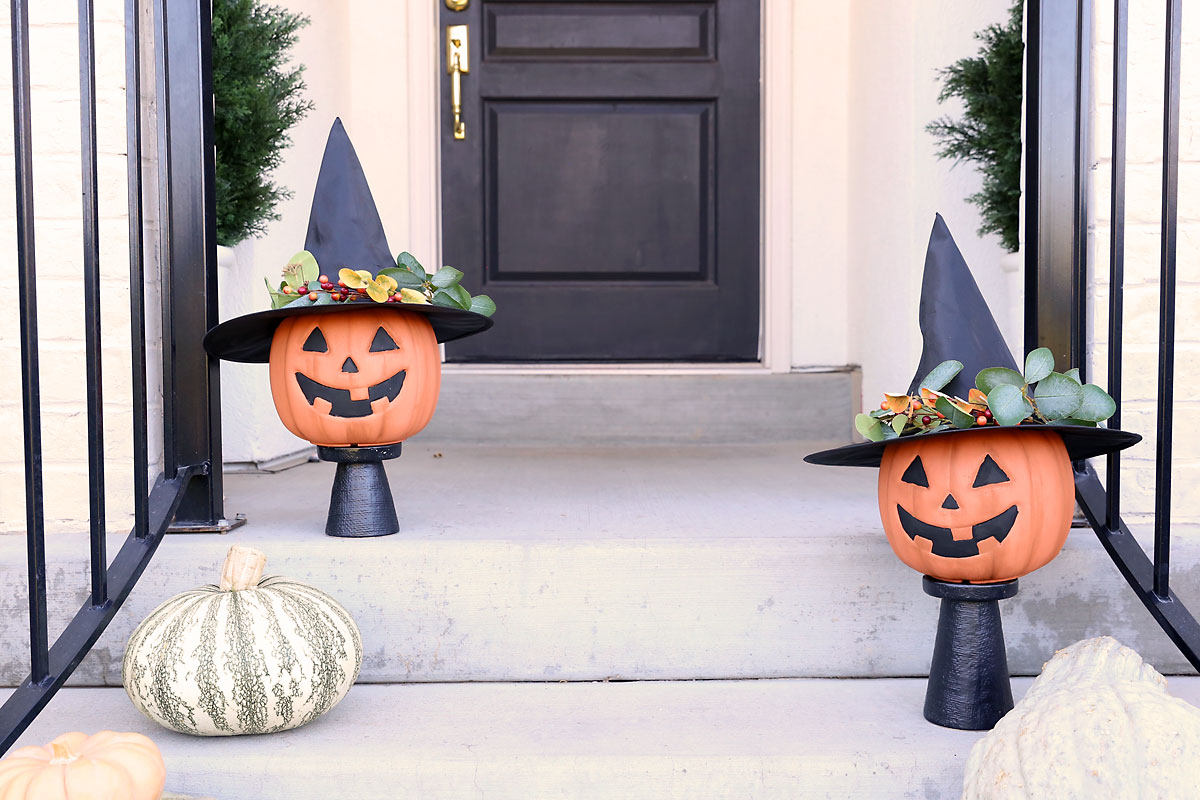
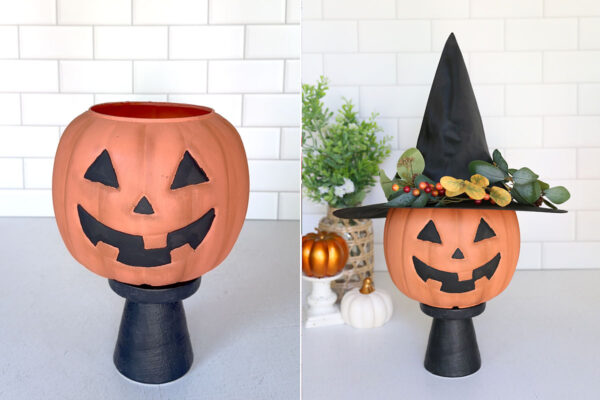
Finally, I glued the jack-o-lantern onto a black candle holder, then glued the witch hat on top. I like these candle holders from Amazon because they are sturdy. However, if you plan to set these on your porch, make sure they are in an area protected from wind so they don’t blow over. They’d also look super cute on your mantel or next to the fireplace!


Plastic Pumpkin Makeover
Supplies
- Plastic Pumpkin Bucket
- White Paint acrylic paint or spray paint
- Terra Cotta Paint "Clay Pot" or acrylic paint with baking soda mixed in
- Black Craft Paint
- Home Decor Wax optional
- Paint Brushes chip brush + detail brush
- Witch Hat
- Faux Leaves
- Candle Holder optional
Want more project ideas? Sign up to get my favorite easy crafts and recipes straight to your inbox!
Equipment
- Hot Glue Gun
Instructions
- Begin by painting a base coat using white paint (either acrylic paint or spray paint). The pumpkin doesn't need to be completely white; a base coat just means you can use less of the terra cotta paint for good coverage.

- Once the base coat is dry, paint the pumpkin with two coats of terra cotta paint, allowing it to dry in between. Finish the second coat with up and down strokes to give it the texture and look of a clay pot. Allow to dry.
- Use a small angled paint brush to paint the face black. Just follow the depressions on the bucket. If you get a little black paint out of the lines, simply let it dry and touch it up with the terra cotta paint.
- Optional: Use home decor wax to give the pumpkin an aged and distressed look. Wipe the wax on each vertical depression of the pumpkin and then immediately wipe it back off, letting some wax settle in the depressions.
- Hot glue faux leaves and berries around the front of the witch hat brim.
- If desired, glue the pumpkin onto a candle holder. Then glue the witch hat to the top of the pumpkin.


Leave a Comment